Home »

11 steps to a delicious turkey
Taste Life
By Danielle Cardozo
 I’d like to take this moment to talk turkey.
As we are only one day away from Christmas dinner, I’m seeing all sorts of advice being handed out to turkey newbies. Quite frankly, I’m feeling terrible for them, as the advice they’re often given is about to result in them serving their family a jerky turkey.
I would like to clarify that these tips are for flavour and texture. If you’re a newbie to turkey cooking, please don’t focus on the perfect presentation. No one is judging you on presentation. You’re not a chef. Your family wants flavour! So if you want a tasty turkey, here are a few helpful hints.
1. Thawing your turkey
 Might be a little late now but the average 14-16 lb. turkey takes 48-72 hours to thaw fully in the fridge. If you’ve cooked a turkey and it’s taken longer internally than it should, it’s likely because it wasn’t actually fully thawed in the very centre. This usually results in an unevenly cooked turkey.
2. Stuffing
 Dressing is a bread dish on the side. Stuffing is when you put it in the turkey. Sure, stuffing in a turkey looks great when you present it at the table (does anyone actually carve their turkey at the table?), but it’s texturally all wrong anyway. Dressing should be a textural blend of soft and firm. A combination of moist (it’s not the worst word ever by the way) and crispy. It also interferes with even cooking of the turkey. So get out your nicest casserole dish and bake that beautiful breaded dressing!
3. Brining!
I drown my turkey every year following Alton Brown’s turkey brining recipe found here. I also like to add orange peels and a couple cups of apple cider!
 Don’t worry about the aromatics (though it’s a great recipe!). The brining is what counts. What is brining? Well, according to Wikipedia: Brining makes cooked meat moister by hydrating the cells of its muscle tissue before cooking, via the process of osmosis, and by allowing the cells to hold on to the water while they are cooked, via the process of denaturation. The brine surrounding the cells has a higher concentration of salt than the fluid within the cells, but the cell fluid has a higher concentration of other solutes. This leads salt ions to diffuse into the cell, whilst the solutes in the cells cannot diffuse through the cell membranes into the brine.
I’m content with that answer. Though layman a terms: It forces the flavoured water into the meat resulting in a juicer bird!
4. Butter Massage
Butterball isn’t one of the longest selling poultry companies for nothing. Mix half a cup of room temperature butter with a tablespoon of mixed dry herbs like rosemary, sage, and thyme. Gently separate the skin from the meat. Massage your bird with the butter underneath its skin. It’s quite a therapeutic experience for the both of you.
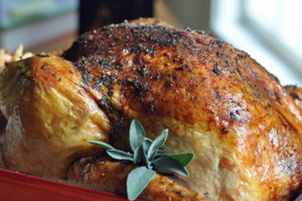
5. The Smell Within
Aromatics are key. Whatever you put inside your bird will permeate into the meat. For this reason I stuff my turkey full of fresh herbs and apples. (Cooked bird shot)
6. Cook Only What You Can Eat
I’m not saying don’t cook leftovers. That’d be a sin. I’m a sucker for hot turkey sandwiches. I’m saying unless you’ll put it in your mouth, don’t put it on your turkey. This means tinfoil. If you must cover your turkey breast because you’re cooking it breast side up, use some thick slice bacon, not tinfoil. I promise you won’t regret it. Best part is, you take it off an hour or so before guests arrive. You have a snack and they’ll never know your secret!
7. Cooking Time
For anyone who has been telling their friends 20 minutes per pound… Stop that! Folks, that’s nuts. If you listen, you’re about to serve your family dry gobble gobble. Twelve minutes per pound is just fine, and that’s for up to 25 lbs. If you go beyond 25 lbs (which I’d never recommend), it’s going to further reduce the cooking time. But please remember that even then, they’re just guidelines!
8. Cooking Temp
Crank that baby to 400 degrees to start. Cook it high and uncovered for the first hour to deal that skin up. Then reduce to 300 degrees. 315-325 degrees if you find your oven takes longer than usual to cook most foods. You know your oven best.
9. Temperature Takes Precedence
170 degrees is what you want both the breasts and leg meat to read. Folks, buying a thermometer is the best thing you’ve ever done for your guests. Time is a guideline. Temp is a rule.
10. Resting Time
 Hot water molecules love to move! So when you take that bad boy out of the oven, let it rest. Thiry minutes is a pretty good rest period. The molecules have time to cool and settle. This will mean more juice in your meat, rather than on your cutting board. It’ll also allow the molecules to move to dryer areas of the bird, allowing more moisture.
11. Let Your Breast Down
I’m not all about presentation for family dinners; I’m all about the best damn tasting bird I can get on the table. I carve the turkey before it hits the table anyway. For this reason, I cook my turkey upside down. Breasts down that is. All the juices flow to the bottom of the pan, so where better for the majority of your poultry meat to be positioned?
I hope with just over 24 hours until turkey dinner, that I’ve provided turkey newbies with some helpful hints! Merry Christmas to you all!
Danielle
XOXO
 – Danielle Cardozo is a mom of three, entrepreneur, and shameless idealist. Whether it be creating it, sharing it, or writing about it; the culinary world is her ultimate passion. Danielle placed eighth on the first ever season of CTV’s MasterChef Canada, and has continued blazing her trail in the culinary world since. Danielle contributes her success to hard work and being stubborn, as she’s never believed anyone who has told her she can’t do something.
Facebook https://www.facebook.com/danielle.c.cardozo
Website https://daniellecardozo.ca/